Summer Fun

Summer Fun

Sunday, June 19, 2011

Strawberry Jam


I know it's been a while since I have posted.  I've been really busy with the kids.  The school here tried to cram every possible activity they could into the last month of school and 4 baseball games a week has kept us hopping.  Now that baseball has ended for one boy and there is only a week and half of school left I feel like I have a little more time.  I'm trying to soak up every extra second with my hubby while we have this wonderful assignment and I actually get to see him everyday.  To spend some quality time together as a family this weekend we went strawberry picking.  Oh what fun it was to see our children tromp hike through that strawberry fields to find the perfect berries.  And by the way the Quonset View Farm is a cute little place and they were so very nice there.  A little more than 5 quarts later...I was wondering what in the world I was going to do with all these strawberries...especially considering Miss Mess and I are really the only two in the family that eat them.  That's a lot of strawberries folks.  JAM that is all I could think of that would use them all and really quickly.  Well almost all I still have about a quart left.  I think a pie will have to be make tomorrow.

Now I'm really lucky that I have a mother that never gets rid of anything and the last time I was there I found a water bath pan!  Yes of course I brought it home with me.  Making jam takes me back to my childhood when I spent many hours in the plum tree outside my Grandma's house picking plums then helping her make plum jelly.  I can remember sitting around her dinning room table pealing plums, and helping her mash them.  Listening to her and my mom talk the entire time.  I remember the heat and smells from the fruit cooking.  So today took me back a little, as Miss Mess and I cored and smashed strawberries.  Of course the boys tried to help a little but they really could careless about the process they just want to eat the jam.

This was the first time I've done jam by myself, so I was a little nervous, but it was not near as hard as I thought it was going to be.


Of course I found a few little tools that made my job a little easier, the jar lifter the funnel, and the lid lifter, in the canning section and that big ol' super center we all know...

First things first, place your lids in a small pan of hot water.  Not boiling just really really hot.  I keep my burner on 2 for this.

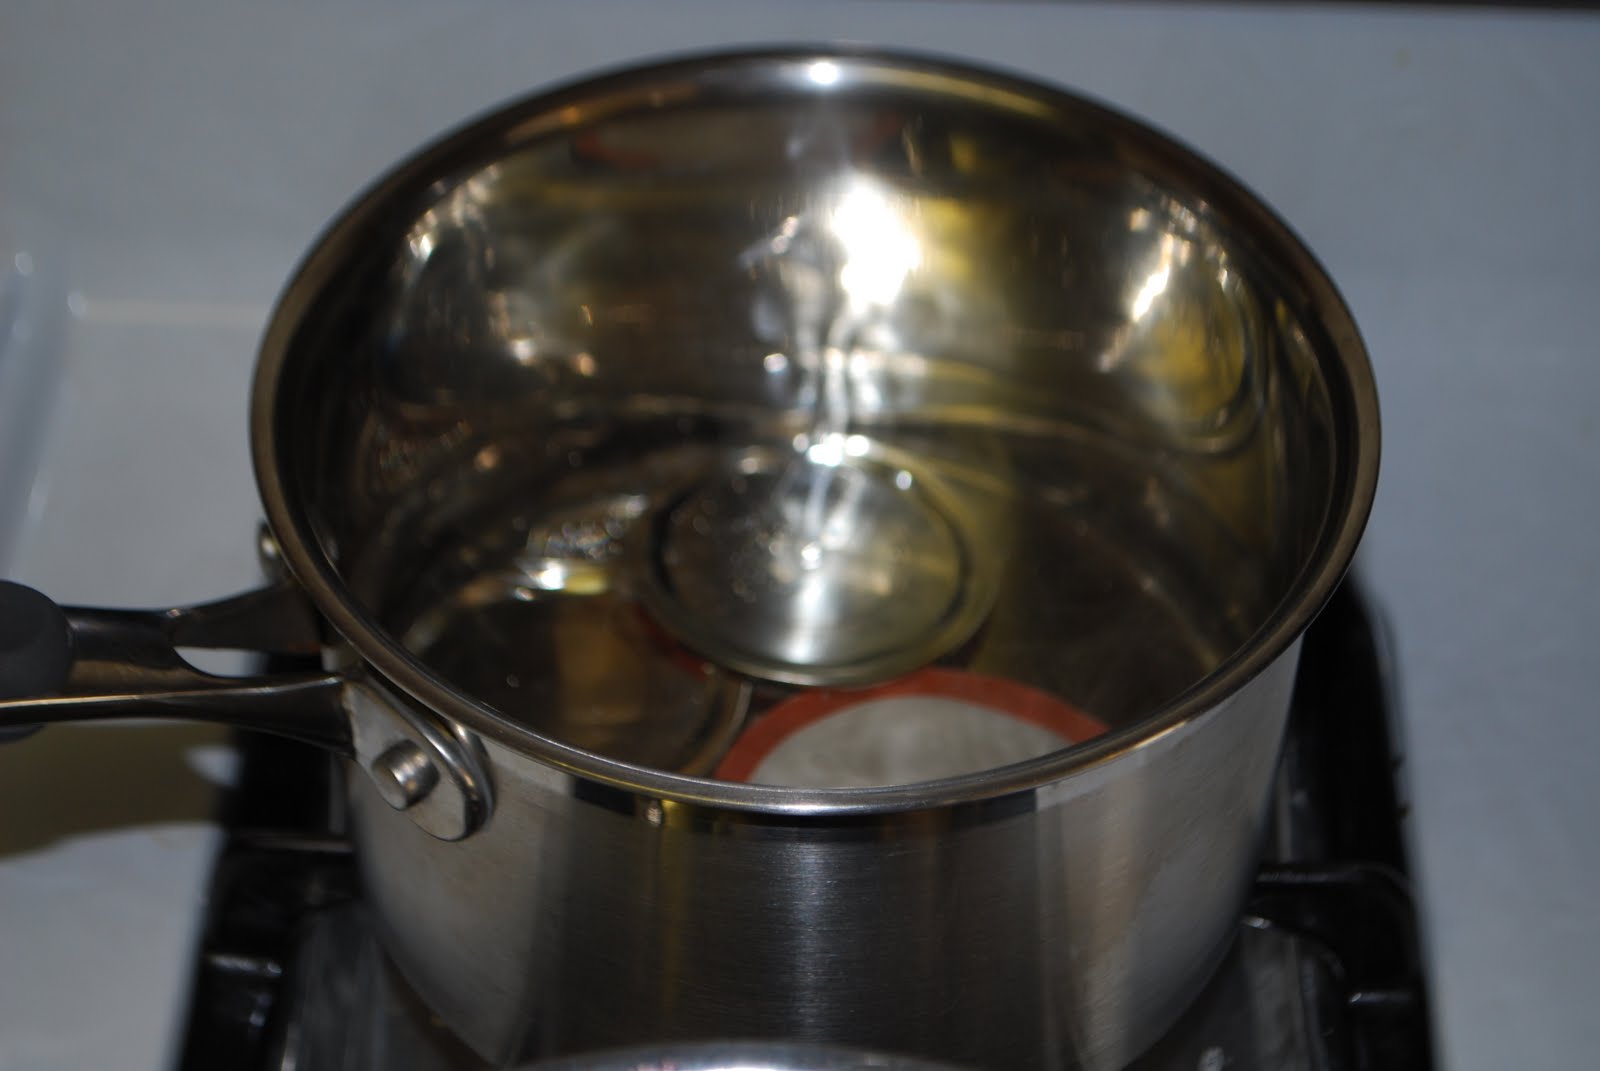
Then start your water bath pan and add your jars, not boiling just really really hot also.


Now you need to cut and smash strawberries until you have 4 cups of smushed mashed strawberries.  Place in a heavy bottom sauce pan a pretty big one.  Add 4 cups of sugar and 1/4 cup lemon juice.  Heat on low until all the sugar has melted then turn up the heat.  Stir until mixture reaches a rolling boil and you can not stir it down.  Then keep boiling until it reaches 220 degrees.  It takes about 10 minutes stirring constantly.  If you take it off the heat to soon the jam will be runny.  You can add about 1/2 tsp of butter to keep the foam down, and trust me this stuff will foam! 


Once you've reached 220 degrees.  Carefully remove your jars from the hot water (when you get the jars out of the water turn up the heat) pour out any water and add the mixture.  Leaving about 1/2 inch of space at the top of the jar.  Once you have your jars filled take a non-metallic spatula and scrape down the inside of the jars to remove any air bubbles.  Add more of the mixture to top off if needed. 


Once you have the jars filled carefully remove the lids from the hot water one at a time and place on the jars.


One of the handy little tools I found.  It's a magnet ;-)  made getting those lids out easy peasy!

Once you have the lids on the jars, place the rings on and hand tighten.
Place back into the water bath pan that now should have boiling water in it, if you turned up the heat when you pulled the jars out.
Boil for 12 to 15 minutes, make sure your jars have at least 2 inches of water over the lids.


Remove from the boiling water and let stand until cool.  The tops of the jars should not pop up and down.  If it does the jar did not seal.  Place in the refrigerator and it may be used for up to 3 weeks.  The jars that do seal are good for 6 to 9 months if kept in a cool dark place.

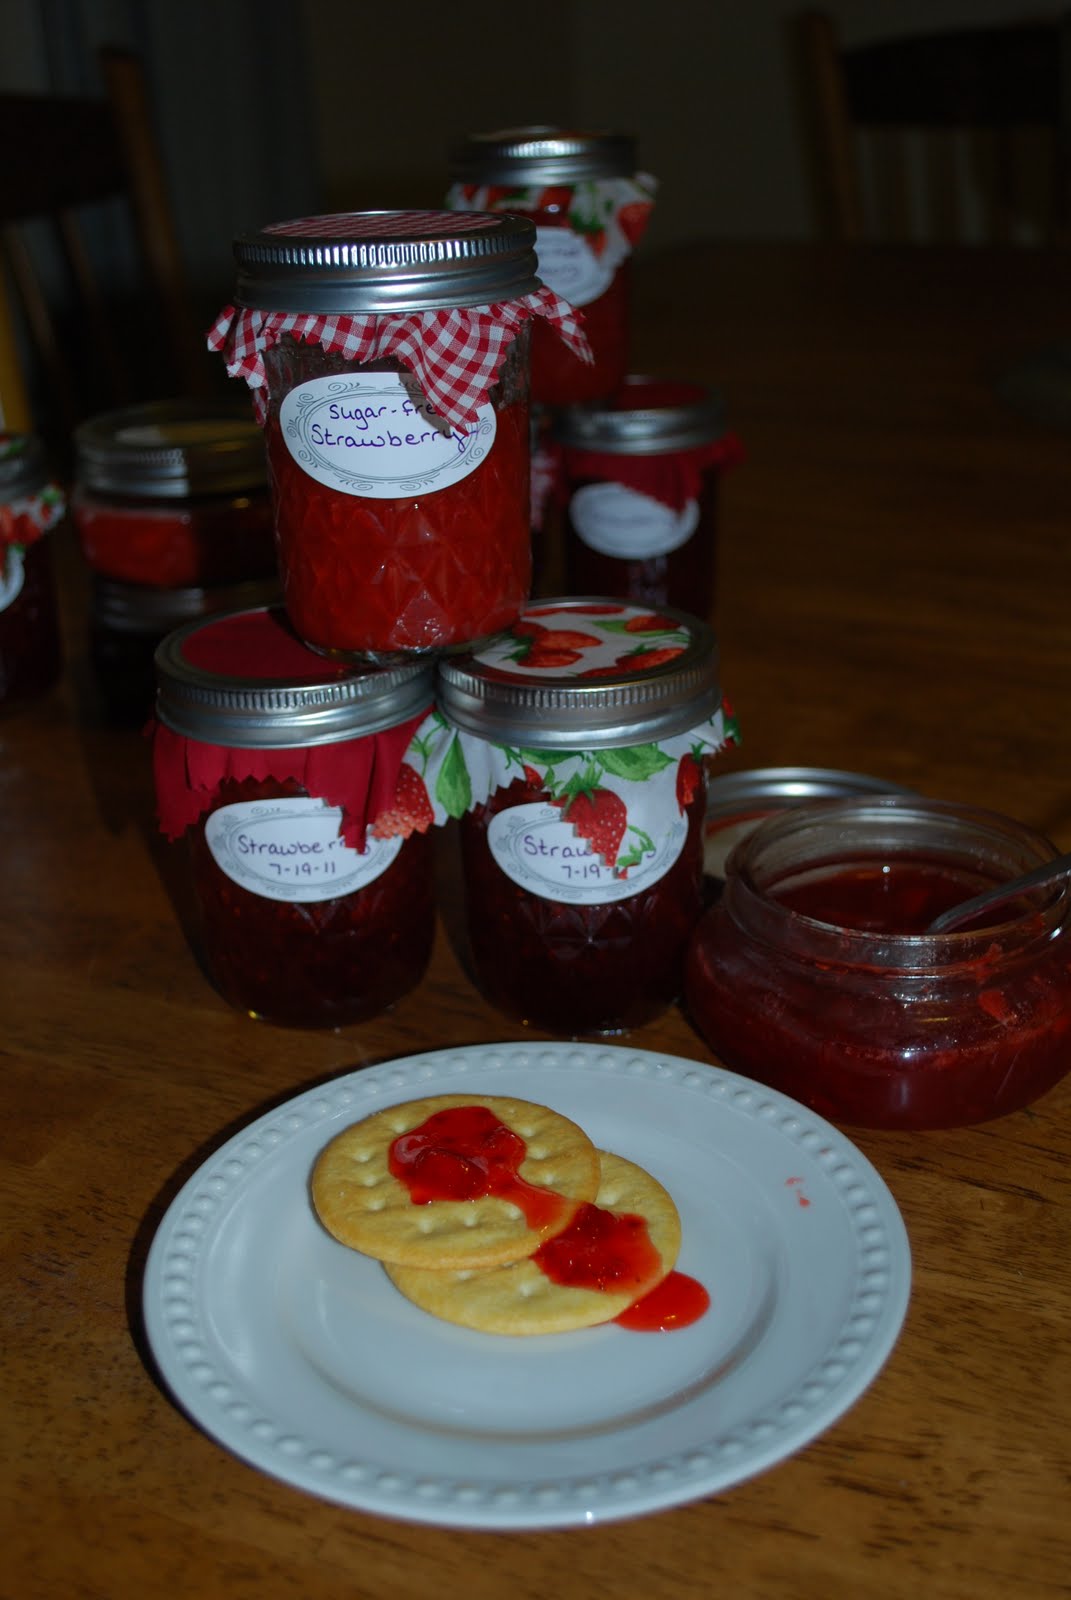
Of course in our house we keep one out to use now!

Notice the color difference in the top jar compared to the bottom???  Well the top one is sugarless.  I tried a new product for me called Real Fruit Pectin Low or No Sugar.  I made 3 jars with this and I guess we'll see.  I just followed the insturctions included with the product.  Just recently my daddy was put on a "cut the sugar out" diet.  I plan on taking these to him when I get to go visit this summer. 

Saturday, April 23, 2011

Hoppy Easter

Down the Rabbit Hole.
Here lately I've been on a cookie and cupcake kick.  Mostly because they are easier for the kids to grab and take to the table themselves.  So down the rabbit hole we go...

What you need
1 recipe of butter cream icing
1 package of malted milk eggs
6 Oreo cookies
1 tsp of edible pearls
Green color paste
Pink color paste
yellow color paste
black color paste

Bake your 24 cupcakes in green cupcake papers.
Mix your butter cream icing
3/4 cup of shorting
1 tsp vanilla
2 Tbls water
2 Tbls meringue powder
1 lb powder sugar
Add water 1tsp at a time until you get the consistency you need.  I used a medium consistency.

Remove about 1Tbsp and set aside for pink, 1 for yellow and 1 for black
Remove about 4 Tbsp to keep white
Add green paste to what is left for a light green
Add the light green to one side of a pastry bag fitted with a small leaf tip, I used tip #352
Add more green to the bowl to make a darker green, fill the other side of the bag with the dark green.
I also paint a strip of green paste inside the bag to get a darker green streak when the icing flows out.


Pipe on until the cupcake is covered. Continue to pipe all but 4 cupcakes.


With the remaining 4 cupcakes ice them smooth and dip into crushed Oreo cookies.  To crush the cookies removing the filling.  No don't lick it out no matter how tempting ;-) scrape it out, then place the cookies in a ziplock bag remove the air and roll with a rolling pin until the cookies resemble dirt.


 Arrange on a tray with the holes surrounded by the green grass.  Add the Easter egg candy to the tops scattered in the grass.  To finish off color 1 Tbsp pink and the other yellow.  Add to a pastry bag fitted with a small flower tip.  I used #224.  Add small flowers over the tops of the cupcakes.


Now for those cute little bunny tails.  Humm well these gave me a little trouble.  I kept getting Oreo all over my white.  GRRRR I hate when that happens.  So finally I ended up filling the palm of my hand with the little pearls and filling the pearls with a small ball of while butter cream from a large round tip I used tip number 12 and then just kind of rolled it in the pearls and placed in the center of the Oreo covered cakes.  For the feet, I just pressed the tip a little and drew two lines from the Oreo covered to the icing covered.  With black icing I drew on the little tows and the pads.  And you're done.

Hope ya'll have a wonderful Easter.  We are looking so forward to an early church service followed by a day of hunting eggs and celebrating.

Friday, April 15, 2011

Birds Nest


OH SO EASY!


These little birds nest are just so fun and yummy.  Such a cute little Easter treat my mom started these when I was a kid, she used a little different recipe than I do.  She used cornflakes where I use rice noodles, I like the look of the rice noodles and they taste just the same. 


What you need.


And that is it.  Really that is it.


12 oz of Rice Noodles
12 oz of Butterscotch chips
and Mini eggs...I use whoppers they are just what I like but really any tiny candy egg will work


Pour your chips in a microwave safe bowl and heat for 30 seconds.  Remove and stir, repeat until the chips are melted.  Butterscotch chips do not melt the same way chocolate does, they are thick and gooey.  Pour in the rice noodles and carefully stir until they are mixed.  Fill 1/4 cup with the mixture and dump on a sheet of wax paper.  It gets a little messy because you have to form the nest part with your fingers just kind of press a small indentation in the middle on the top and add your candy eggs.  Let stand for about 15 minutes before you serve.

This recipe makes about 24 nest.
Enjoy

Monday, April 11, 2011

Two for One


I LOVE recipes that allow me to make more than one thing at a time out of one bowl!  I make homemade rolls for Sunday lunches.  We have two choices for church so we go to the early one.  This gives me enough time to fix the extras to go with lunch.  Well I've discovered that I can double the roll recipe and make pull apart bread.  


Rolls
2-2 1/2 cups flour                                     
1/2 tsp. salt
2 Tbsp. sugar
1 Tbsp. yeast
1/2 cup milk
1/4 cup water
2 Tbsp. Margarine

Mix 3/4 cup flour, sugar, yeast and salt in large bowl.  Heat milk, water and margarine until it reaches 120 to 130 degrees.  Not boiling or you'll kill your yeast.  I heat it for about 90 seconds in the microwave.  Add to bowl and beat for 2 minutes on medium speed.  Add 1/4 cup flour.  Beat 2 minutes on high.  By the way you need a bread paddle, this will do a number on a regular mixer, I might have learned that the hard way ;-).  You must beat each for 2 minutes to activate the yeast.  Stir in the rest of the flour until it makes a stiff dough.  Knead 2-3 minutes.  Place in a greased bowl and let rise 20 minutes.  Divide dough into 12 pieces and shape into balls.  Place on cookie sheet about 2 inches apart.  Let rise 15 minutes.  Bake at 375 degrees for 20 minutes.


Now if you need a dessert, and who doesn't need a dessert...double the above recipe.


Spray your Wilton Nonstick Fluted Tube Pan.  Form the left over dough into balls.  Place around the bottom of the bundt pan.  Just place them in until the bottom is covered.  I don't make them all the same size I just kind of make balls and place them in the bottom of the pan until I get the bottom covered.  Sprinkle with about 1/3 cup of sugar,  sprinkle with cinnamon and chopped pecans.  Slice a 1/2 of a stick of butter into thin pads and place over the balls.  Bake at 375 for 25-30 minutes.  Let cool for about 10 minutes then dump onto a platter and serve. 


Careful this is sticky yummy

Friday, April 1, 2011

Sweet April Fools


So we started off our day with lots of April Fools.  Mother Nature pulled out all the stops with a nice little snow storm for us...Breakfast was 'Bacon and Eggs' with cereal of course being that my children will only eat cereal for breakfast.  But our bacon wasn't bacon and our eggs were not eggs and our milk changed colors when it was poured upon the cereal.  Both of these are really cute and easy idea.


To get the milk to change colors add a few drops of food coloring to the bottom of the bowl, pour the cereal over the top and add milk.  As the kids eat or stir the milk will change colors.  My boys loved it!  Miss Prissy cried and refused to eat red milk.

Eggs
White Chocolate Chips
Yellow M&M's ----you can buy a small package if you are only making a few, I bought the BIG one, can't imagine what I will have to do with all the left overs.. ;-)
Wax Paper

Bacon
1 caramel square
1 Tootsie Roll
Per piece of bacon

 
For the eggs, pour 1/2 cup of white chocolate chips in a glass microwave safe bowl.  Heat on medium high, really who knows how to change the settings on their microwave, for about 30 seconds remove and stir.  Heat until melted stirring every 15 seconds following the first round. Do not just put it in there for a minute chocolate WILL burn and YUCKY it will be! Think I've seen one too many episodes of Star Wars the week...oh the joys of having boys.


Pour the melted chocolate into a parchment paper bag or into a Ziploc.  I use parchment paper bags because I keep them on hand for my cake icings.  But this is a trick for getting hot runny chocolate into a bag without burning yourself.  Place your bag in a cup, fold the edges over the top and then just pour into it.  Zip it up and snip a SMALL corner off the bottom. 

Terrible lighting sorry
See the big mess at the top???  ignore that the bag I was using busted, you would think this was my first attempt at this...  Anywho they look all lumpy and bumpy right at first but once they sit for a few minutes they get all smooth and perfect looking.  I place mine on a cookie sheet and refrigerate for about 20 minutes.

Bring home the bacon now...

On a small microwave safe plate place one half of a piece of caramel and one tootsie roll. And heat for about 5 seconds or until pliable. (glass plates work best so when you forget to check it and it melts, it wipes right off)

Not that I would do such a thing ;-)

This is what you do next, cut each candy in half and press together.  Careful if you heat them too long it hurts.


Press the two halves together again. Then work the soft candy flat till it looks like a small piece of bacon.

This is what it will look like.
And our day just kept getting trickier.

I delivered Popcorn to the kids' classrooms and the hubby's.  Well he took his in but you get the picture.
These are really mini cupcakes with marshmallows for popcorn.
Very simple, in white mini cupcake cups fill about 3/4 of the way full with any white cake mix.
Bake for about 15 minutes or until lightly golden and toothpick comes out clean.

While they are cooling on a wire rack cut mini marshmallows in thirds.  You need both yellow and white marshmallows.  About 1 cup of each.  Arrange the three slices into a petal looking shape and add a drop of vanilla icing and top with a whole marshmallow.
Mix up the colors don't do them all the same.

Ice the top of the cupcakes, I did something I never only do once in a while, I used store bought can frosting. YUCK. Add about 3 sets of the marshmallows to the top of  each cupcake.  In my defense I did make 8 and 1/2 dozen cupcakes last night.  I was not going to spend the time mixing all that buttercream.


Fill a popcorn bag or bowl with paper filling and add the cupcakes till they peek out of the top.

Oh then there was dinner...I do love April Fools Day :-)

For dinner we had cupcakes and peas with spaghetti and meatballs for dessert.


Once again both are very simple.  Of course the cupcakes aren't really cupcakes.  And I so wish I had had a video of the hub's face.  I wasn't so sure I was going to get him to try them.
It is just meatloaf baked in cupcake cups.  It works best if you use the little foil cups inside a muffin tin.  And the icing is mashed potatoes with food coloring mixed in swirled on top.

The Spaghetti and Meatballs are really white cupcakes with buttercream icing piped on with a number 3 tip.
The sauce is strawberry preserves and the meatballs are Ferrero Rocher Fine Hazelnut Chocolate 5.3oz dipped in the preserves.

So needless to say we had a fun day and I hope ya'll did also.
Happy April Fool's Day!

Wednesday, March 16, 2011

St. Patrick's Day Whoopie Pies


I'm so excited that tomorrow is St. Patrick's Day.  No I'm not Irish but I love any excuse to bake :-).  So today I will be making chocolate whoopie pies with mint cream filling for tomorrow.  Yummmmy  Of course that is going to require me to head to the grocery in the rain, hey at least it's not snow and ice anymore.

What you need....
Pies
1 Duncan Hines Devil's Food Cake mix
1 cup of water
3 large eggs
1/3 cup oil

Filling
1/2 Cup Shortening
1 stick of butter or margarine
1 tsp of mint extract
2 Tbsp. milk
1/4 cup of sugar
4 cups/1 lb of powder sugar
green food coloring

Pre-heat oven to 350 degrees
A chocolate cake mix.  I know, I know, a mix. But you really can't beat a Duncan Hines Moist Deluxe Devil's Food Cake Mix, 18.25-Ounce Boxes (Pack of 6).

For this do not follow the recipe on the box. 

In a large mixing bowl, mix cake mix, water, oil and eggs for 30 seconds until blended on low, then mix for 2 minutes on medium.  Mix the full 2 minutes.  Yes it makes a difference.  Drop by rounded tablespoon full on a cookie sheet lined with parchment paper.  Okay I know I say I use parchment instead of spray, but this time parchment is a must!  Or good luck getting these babies off the pan.  Bake for 10 minutes or until a toothpick comes out clean.  Remove on the parchment to a wire cooling rack.  Cool for 10 minutes before you remove from the paper.

While the pies are baking, mix the filling.
cream together butter and shortening for about 1 minute.  Add sugar (not powdered yet), mint, green food coloring, I use Wilton 601-5580 1/2-Ounce Certified-Kosher Icing Colors, Set of 12and milk mix until creamy.  Then add powered sugar 1/2 cup at a time.  Fill a pastry bag, fitted with a number 12 tip if you don't have a pastry bag fill a Ziploc and snip off a corner.  Swirl onto the inside of one pie then top with another pie.  Sprinkle the edges with green sugar.  Everything needs a little sparkle.

This may be the best mint filling I've ever had.

Tuesday, March 15, 2011

Peanut Butter Cookies

One of those days, it is 2:30 and the kids will be off the bus at 3:00.  Yikes no snack planned today.  But I do have my all time favorite peanut butter cookie dough in the freezer :-). 

I love these cookies because the dough freezes so well.  All you have to do is form into a log, notice I didn't say roll, this dough does NOT roll, I wrap them in freezer paper then pop in a freezer bag.  Also don't write on that freezer bag, write on the paper.  See that way you can reuse your bag.  That is my trade off for using parchment paper.  Just a little side note: If you will leave the roll on a cookie sheet, place in the freezer unwrapped for about 30 minutes then wrap with the paper it will not stick to the paper.

I found out these freeze well because the recipe makes so many, 144, there is no way we could eat them all.  Well I could but I shouldn't and the kids most definetely should not!  I was thinking mix half a batch and my hands mixed a whole.  So there you have it, 2 good sized logs in the freezer 2 months ago.  See way I love it?  SO easy!

Peanut Butter Cookies

Not as pretty without the crosscrosses but still yummy


4 cups all-purpose flour
2 teaspoons baking powder
3 teaspoons baking soda
1 1/2 teaspoons salt
2 jars (18 ounces each) creamy peanut butter
2 cups butter softened
2 cups packed brown sugar
2 cups granulated sugar
4 large eggs
2 teaspoons vanilla extract

Preheat oven to 350 degrees                                                  

1.  In a medium bowl wisk together flour, baking powder, baking soda, and salt until well blended.

2.  In large mixing bowl beat peanut butter, butter, and both sugars at medium speed until creamy.  Reduce speed to low; beat in vanilla, then eggs one at a time until creamy.

3. Add flour mixture and mix until just blended.

4.  Drop by rounded measuring tablespoons, 2 inches apart, onto ungreased (parchment papered) large cookie sheet.  Dip the times of a fork into sugar, then press crisscross pattern into top of each cookie.

5.  Bake until lightly brown, 12 to 14 minutes.  Transfer cookies to wire racks to cool.

Now if this is frozen of course there will be no crisscross pattern unless you want to slice then let thaw.  I just slice, place on pan and straight into the oven frozen about 15 minutes at 350.  No they are not as pretty as the fresh dough ones but they still taste goooood.

 Complete mystery in my kitchen, rack was full, left the room to get the to get the camera....hummmm ;-)

So in about 20 minutes you can have homemade fresh baked cookies.  I know my kids will be excited when they get home from school.